“Raspberry Pi AI HAT+” is an aftermarket AI processing module that appeared on October 24, 2024, and can add up to 26 TOPS of AI processing power to Raspberry Pi 5. I received such a Raspberry Pi AI HAT+ from the development team, so I actually attached it to Raspberry Pi 5 and created an AI camera with object recognition function.
AI HAT+ – Raspberry Pi Documentation
https://www.raspberrypi.com/documentation/accessories/ai-hat-plus.html
AI software – Raspberry Pi Documentation
https://www.raspberrypi.com/documentation/computers/ai.html
hailo-rpi5-examples/doc/basic-pipelines.md at main · hailo-ai/hailo-rpi5-examples · GitHub
https://github.com/hailo-ai/hailo-rpi5-examples/blob/main/doc/basic-pipelines.md
·table of contents
◆1:Check the appearance of Raspberry Pi AI HAT+
◆2:Attaching Raspberry Pi AI HAT+ to Raspberry Pi 5
◆3:Build an execution environment for AI camera
◆4:Run Raspberry Pi official AI camera demo
◆5:Run Hailo’s AI camera demo
◆1: Check the appearance of Raspberry Pi AI HAT+
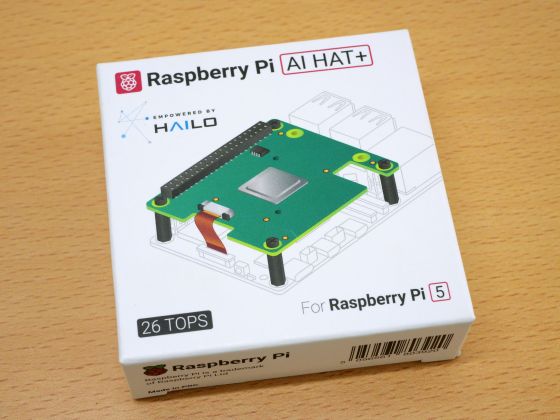
The Raspberry Pi AI HAT+ package looks like this. Raspberry Pi AI HAT+ has a model with AI processing performance of 13TOPS and a model with 26TOPS, and this time the 26TOPS model was sent by the Raspberry Pi development team.
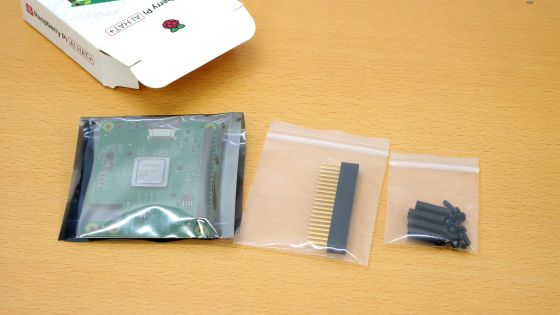
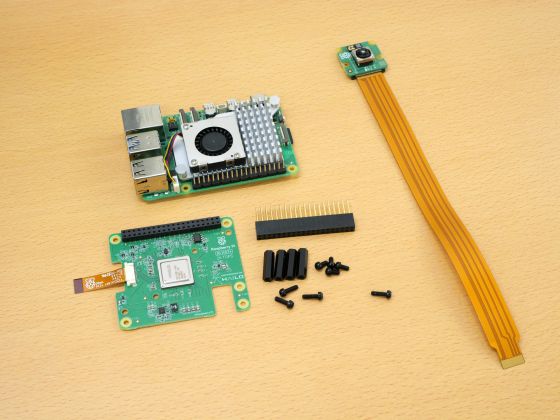
Inside the package was the Raspberry Pi AI HAT + main body, GPIO stacking header, spacer, and screws.
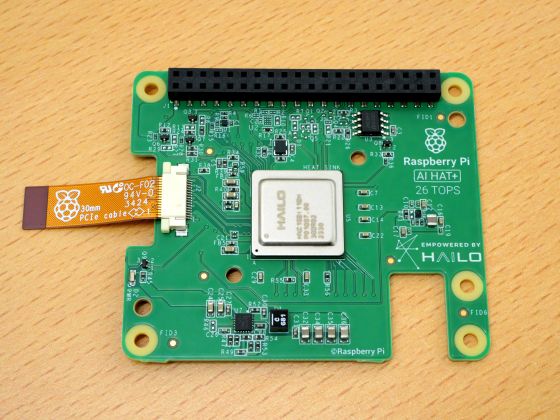
This is Raspberry Pi AI HAT+.
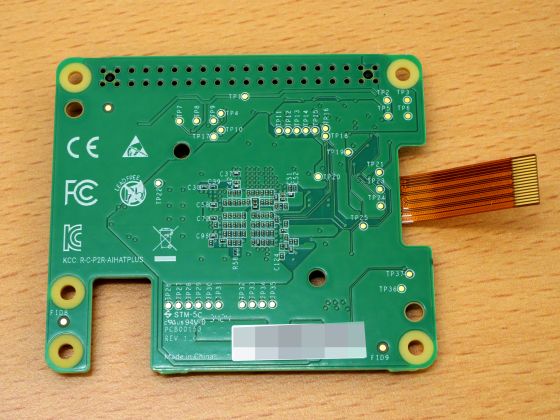
The back side looks like this.
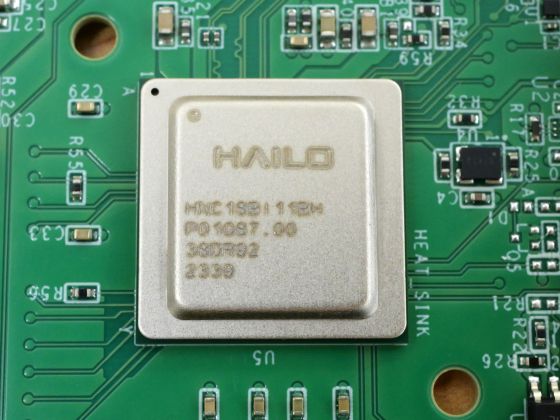
In the center is an AI accelerator made by Hailo.Hailo-8” is installed. In addition, for the 13TOPS model,Hailo-8L” will be installed.
◆2: Install Raspberry Pi AI HAT+ on Raspberry Pi 5
To create an AI camera, we prepared “Raspberry Pi AI HAT+”, “Raspberry Pi 5”, and “Raspberry Pi Camera Module 3”. In addition, when installing Raspberry Pi AI HAT+, please use the official air cooler “” on Raspberry Pi 5.Raspberry Pi Active Cooler” is recommended.
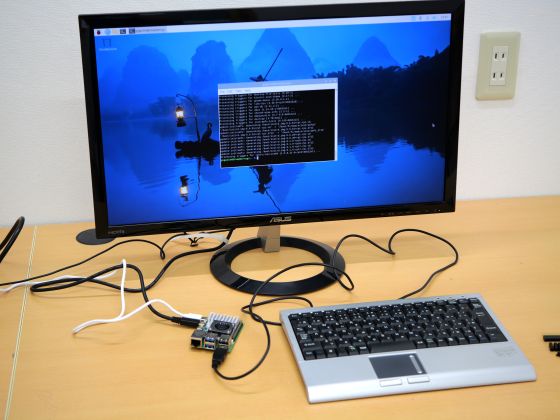
First, start the Raspberry Pi 5 and update the software and firmware.
First, update your software to the latest version.
sudo apt update
sudo apt upgrade
Next, update the EEPROM firmware. Run the following command to check the current version and the latest version available.
sudo rpi-eeprom-update
The execution results are as follows. If the firmware is a version before December 6, 2023,documentYou need to change the settings accordingly. This time, the version from April 17, 2024 was already installed, so we will continue with the update.
*** UPDATE AVAILABLE ***
BOOTLOADER: update available
CURRENT: Wed 17 Apr 12:54:23 UTC 2024 (1713358463)
LATEST: Mon 23 Sep 13:02:56 UTC 2024 (1727096576)
RELEASE: default (/lib/firmware/raspberrypi/bootloader-2712/default)
Use raspi-config to change the release.
Update the firmware with the following command and reboot.
sudo rpi-eeprom-update -a
sudo reboot
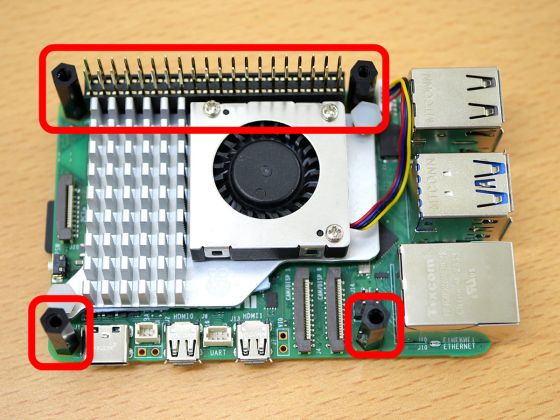
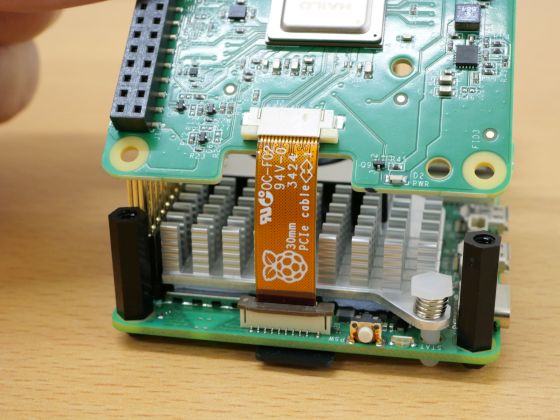
Once it starts up successfully, shut down the Raspberry Pi 5 and move on to installing the Raspberry Pi AI HAT+. First, attach the spacer and GPIO stacking header to the Raspberry Pi 5. The screws were made of plastic, so be careful not to over-tighten them.
Next, connect Raspberry Pi AI HAT + with a ribbon cable.
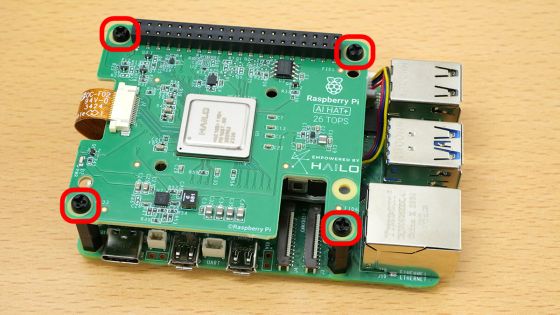
Fasten the screws in 4 places.
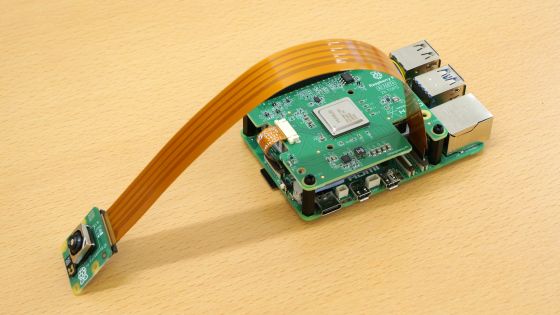
Next, connect Raspberry Pi Camera Module 3.
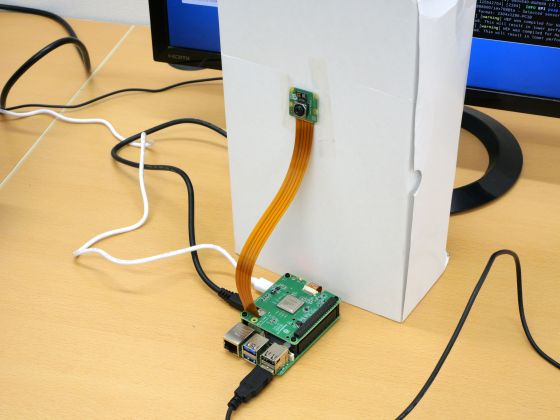
Finally, fix the camera and you are ready to go. This time, I simply pasted it on an empty box and fixed it.
◆3: Build an execution environment for AI camera
・Switching to PCIe Gen 3.0
Raspberry Pi 5 operates at PCIe Gen 2.0 in the standard state, but it is also possible to switch to PCIe Gen 3.0. When using Raspberry Pi AI HAT+, it is recommended to switch to PCIe Gen 3.0.
To operate with PCIe Gen 3.0,/boot/firmware/config.txt” by adding the following line.
dtparam=pciex1_gen=3
Restart after rewriting the configuration file.
sudo reboot
・Install the necessary packages
To install the AI accelerator drivers, run the following command and restart.
sudo apt install hailo-all
sudo reboot
・Check if it was installed correctly
Execute the following command to check whether the Raspberry Pi AI HAT+ installation and software installation have been completed correctly.
hailortcli fw-control identify
It is OK if the firmware version and AI accelerator name are output as shown below. In the document, the serial number and product name were also displayed, but this time,
Executing on device: 0000:01:00.0
Identifying board
Control Protocol Version: 2
Firmware Version: 4.18.0 (release,app,extended context switch buffer)
Logger Version: 0
Board Name: Hailo-8
Device Architecture: HAILO8
Serial Number:
Part Number:
Product Name:
You can also check AI accelerator related events in the kernel log with the following command:
dmesg | grep -i hailo
The result this time was like this.
[ 3.884998] hailo: Init module. driver version 4.18.0
[ 3.885122] hailo 0000:01:00.0: Probing on: 1e60:2864…
[ 3.885127] hailo 0000:01:00.0: Probing: Allocate memory for device xtension, 11632
[ 3.885144] hailo 0000:01:00.0: enabling device (0000 -> 0002)
[ 3.885150] hello 0000:01:00.0: Probing: Device enabled
[ 3.885168] hailo 0000:01:00.0: Probing: mapped bar 0 – 0000000b494ee36 16384
[ 3.885175] hailo 0000:01:00.0: Probing: mapped bar 2 – 00000000f43891e 4096
[ 3.885181] hailo 0000:01:00.0: Probing: mapped bar 4 – 00000001f13937c 16384
[ 3.885185] hailo 0000:01:00.0: Probing: Force setting ax_desc_page_size to 4096 (recommended value is 16384)
[ 3.885195] hello 0000:01:00.0: Probing: Enabled 64 bit dma
[ 3.885198] hailo 0000:01:00.0: Probing: Using userspace allocated dma buffers
[ 3.885201] hailo 0000:01:00.0: Disabling ASPM L0s
[ 3.885206] hailo 0000:01:00.0: Successfully disabled ASPM L0s
[ 4.171121] hello 0000:01:00.0: Firmware was loaded successfully
[ 4.184529] hailo 0000:01:00.0: Probing: Added board 1e60-2864, /dev/hailo0
You can check whether the camera module is recognized using the following command.
rpicam-hello -t 10s
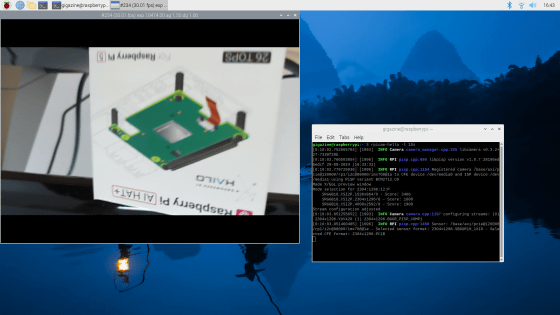
It is OK if the “window displaying the camera image” is displayed for 10 seconds.
◆4: Run Raspberry Pi official AI camera demo
Next, let’s run a demo of the AI camera released by the Raspberry Pi development team. First, clone the latest commit of the repository containing the demo with the following command:
git clone --depth 1 https://github.com/raspberrypi/rpicam-apps.git ~/rpicam-apps
Once the cloning is complete, run the following command to start the “camera AI that identifies the type of object”.
rpicam-hello -t 0 --post-process-file ~/rpicam-apps/assets/hailo_yolov6_inference.json --lores-width 640 --lores-height 640
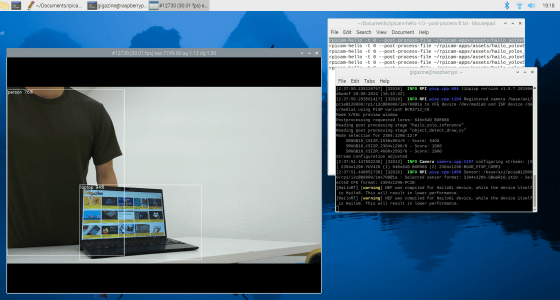
The execution result looks like this. It is able to correctly recognize people and laptops in the camera.
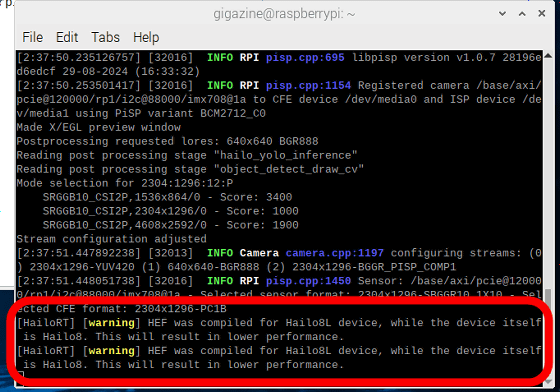
However, the terminal displays an error message that says, “This AI model was created for Hailo-8L, but this device is equipped with Hailo-8. This will not provide optimal performance.” It had been.
◆5: Run Hailo’s AI camera demo
At the time of writing the article, the official demo of the Raspberry Pi development team only has “AI model for Hailo-8L”, soAnother demo provided by HailoI’ll try using .
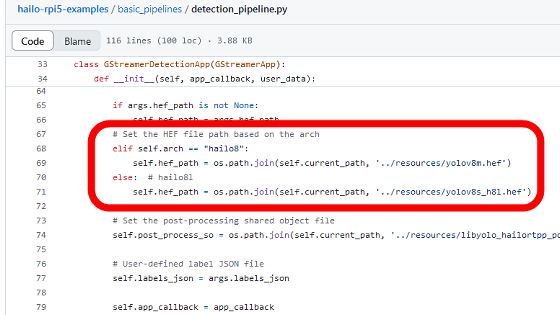
Included in the demohailo-rpi5-examples/basic_pipelines/detection_pipeline.pyIf you check the source code of “, you will find that it contains the following code: “If Hailo-8 is installed, “yolov8m.hef” is loaded, and if Hailo-8L is installed, “yolov8s_h8l.hef” is loaded.” I understand. In other words, by running this demo, you can fully demonstrate the power of Hailo-8, which has a processing performance of 26TOPS.
First, clone the repository, install the required packages, and then run the installation script.
git clone https://github.com/hailo-ai/hailo-rpi5-examples.git
cd hailo-rpi5-examples
sudo apt install meson
./install.sh
After installation is complete, you can run the following command to start the object recognition camera AI included in the Hailo demo.
source setup_env.sh
python basic_pipelines/detection.py -i rpi
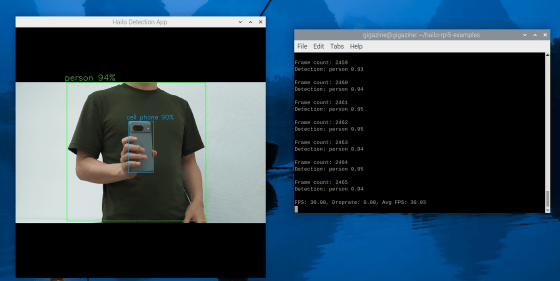
The execution result looks like this. It was able to correctly recognize humans and smartphones.
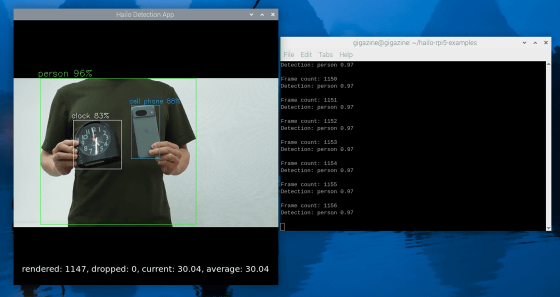
By adding the “-f” option to the command, you can display the frame rate per second on the screen.
python basic_pipelines/detection.py -i rpi -f
The average frame rate per second was 30.04FPS.
Below is a video recording of how the object recognition camera AI works. By using Raspberry Pi AI HAT +, you can experience and develop AI functions like this.

Copy the title and URL of this article


